Happy New Year everyone!!!
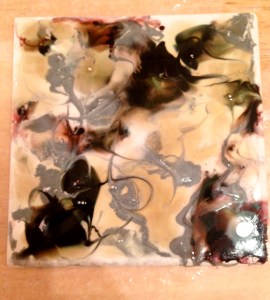
I hope you all had a fantastic New Year’s Eve! My sister and I threw a lovely soirée at our apartment thanks to both my sister’s event planning skills, and the wonders of crafting. People were impressed by the fact that we actually had FOOD at the party (pigs in a blanket?!?!?!) and by the artistic touches. My sister and her best friend spray painted mason jars translucent gold, filled them with water, and floated tea candles on top. They created a banner from silver and gold glitter paper that spelled “Happy New Year.” I made gold glittery snowflake centerpieces. There was even a photo wall made from glitter paper and fun crafted props to hold up, like paper champagne flutes and mustaches. What I was MOST excited about, though, were my alcohol ink coasters. Tragically, I started them too late, and they weren’t dry until New Years Day. But hey, there’s always next year! Take a look at these beautiful coasters and I’ll show you how to make them yourself.
MATERIALS
- Several glossy, nonporous, porcelain tiles
- Alcohol ink (I used black, white, silver and gold for this particular set)
- Rubbing alcohol
- A foam brush
- Self-adhesive felt pads
- Wax Paper
- A ventilated room
- Spray sealer
Step 1: Cover your workspace with wax paper. Ink stains are super difficult to get out! I like to tape the wax paper to the table so it doesn’t shift around.
Step 2: Drizzle rubbing alcohol on a tile. Not too much- just enough so that the surface is wet. Spread with foam brush.
Step 3: Begin dropping alcohol ink onto the surface of the tile. It will spread quickly, and may even lose pigment. Keep dropping ink in the pattern you desire. Then, add another color of ink, layering droplets of color so that they merge and swirl around one another. Continue until you have used all of your desired colors.
Step 4: You have a lot of freedom with this medium. You can use the nose of each bottle as a wand to shift pigment around on the wet surface until you achieve the desired effect. Here, I used the nose of the silver bottle to create a swirling pattern.
Step 5: Modify (if you want!) At this point, I decided I wasn’t happy with the overall look of the tile. So I took the silver bottle and began dropping silver specks inside blobs of black. The colors shifted. I kept playing around until I achieved my desired effect.
Step 6: Let the tiles dry overnight. Be careful if you move the tiles to a different space for drying because the alcohol has not set yet. Tipping the tiles too much could shift the rubbing alcohol on the surface and totally change your artwork.
Step 7: Make sure you are in a room that is ventilated (or just open your back door and infuriate your neighbors) and spray your tiles with a sealant. I wasn’t positive what to use so I asked a salesperson at my local craft store. Usually, a sealant that works on glass, wood etc should work fine. Spray back and forth across the tiles, wait ten seconds, and do a second coat.
Step 8: Throw a New Year’s party and feel sad that your gold and silver New Year’s coasters are drying on top of the refrigerator.
Step 9: 24 hours after you have sprayed your tiles they can be handled. Place self-adhesive felt circles on each corner of the back of the coaster. This will make them sit softly on your tabletop, as opposed to clunking loudly down on every surface. It also makes them more resilient to breakage. Some DIY websites suggest gluing black felt to the back, but I found that the glue seeped through the felt and looked very amateur. The felt also stuck out a little on the sides which ruined the appearance of the coaster (in my perfectionist opinion).
Here is what my final set look like.
I hope you enjoyed this DIY! There are ENDLESS possibilities for alcohol ink. This summer I made a colorful, psychedelic set for my room at school. If you’re thinking bright colors are more your style, take a look! With this set, I painted the sides black with acrylic paint. I opted out for the metallic set because I liked the look of the ink dripping on the sides. Both are fine options.
Merry Crafting and a Happy New Year! If anyone has an idea about how I should spend my $25 Michaels gift card (thanks Santa) let me know!
xoxo, Chloe <3


I love these coasters. Great idea!